
As a WordPress developer at Jackober, I’ve performed countless WordPress installations for clients across various hosting environments. While we currently host our own site on a VPS with CloudPanel, I regularly work with cPanel installations for clients like ValorantInsights.com and MSGlowUp.com. cPanel remains one of the most popular hosting control panels, and its user-friendly interface makes WordPress installation relatively straightforward, even for beginners.
In this expert guide, I’ll walk you through every step of installing WordPress on a cPanel hosting account—from preparation and installation to post-installation optimization. Whether you’re setting up your first WordPress site or your fiftieth, you’ll find detailed instructions, expert tips, and troubleshooting advice to ensure a smooth setup process.
Understanding cPanel and WordPress
Before diving into the installation process, let’s establish some background:
What is cPanel?

cPanel is a web-based control panel for managing hosting accounts. It provides a graphical interface and automation tools to simplify website management tasks. Key features include:
- File management
- Database creation and management
- Domain configuration
- Email account setup
- One-click application installations
- Server statistics and logs
- Security tools
Most shared hosting providers include cPanel with their hosting packages, making it one of the most common control panels for WordPress websites.
Why Install WordPress on cPanel?
There are several advantages to using cPanel for your WordPress installation:
- User-Friendly Interface: Visual dashboard that doesn’t require technical expertise
- Automated Installation Tools: Simplified installation through Softaculous or other installers
- Integrated Environment: All tools (databases, files, domains) in one place
- Resource Monitoring: Easy tracking of site performance and usage
- Backup Management: Simple backup creation and restoration
- Multi-Site Management: Control multiple websites from one dashboard
- Security Features: Built-in security tools and settings
Prerequisites for WordPress Installation
Before beginning, ensure you have:
- A cPanel Hosting Account: Purchased from a hosting provider
- A Domain Name: Registered and pointed to your hosting (for information on domain names, see Does WordPress give you a domain name?)
- Access Credentials: Your cPanel username and password
- Basic Information: Site title, admin username, and email address for your WordPress installation
With these in place, you’re ready to begin the installation process.
Method 1: Installing WordPress Using Softaculous
The easiest way to install WordPress on cPanel is through Softaculous, an auto-installer that comes pre-installed on most cPanel hosting accounts.
Step 1: Log in to cPanel
- Go to your hosting provider’s login page (typically
https://yourdomain.com/cpanelor a custom URL provided by your host) - Enter your cPanel username and password
- Click “Log in” to access the cPanel dashboard
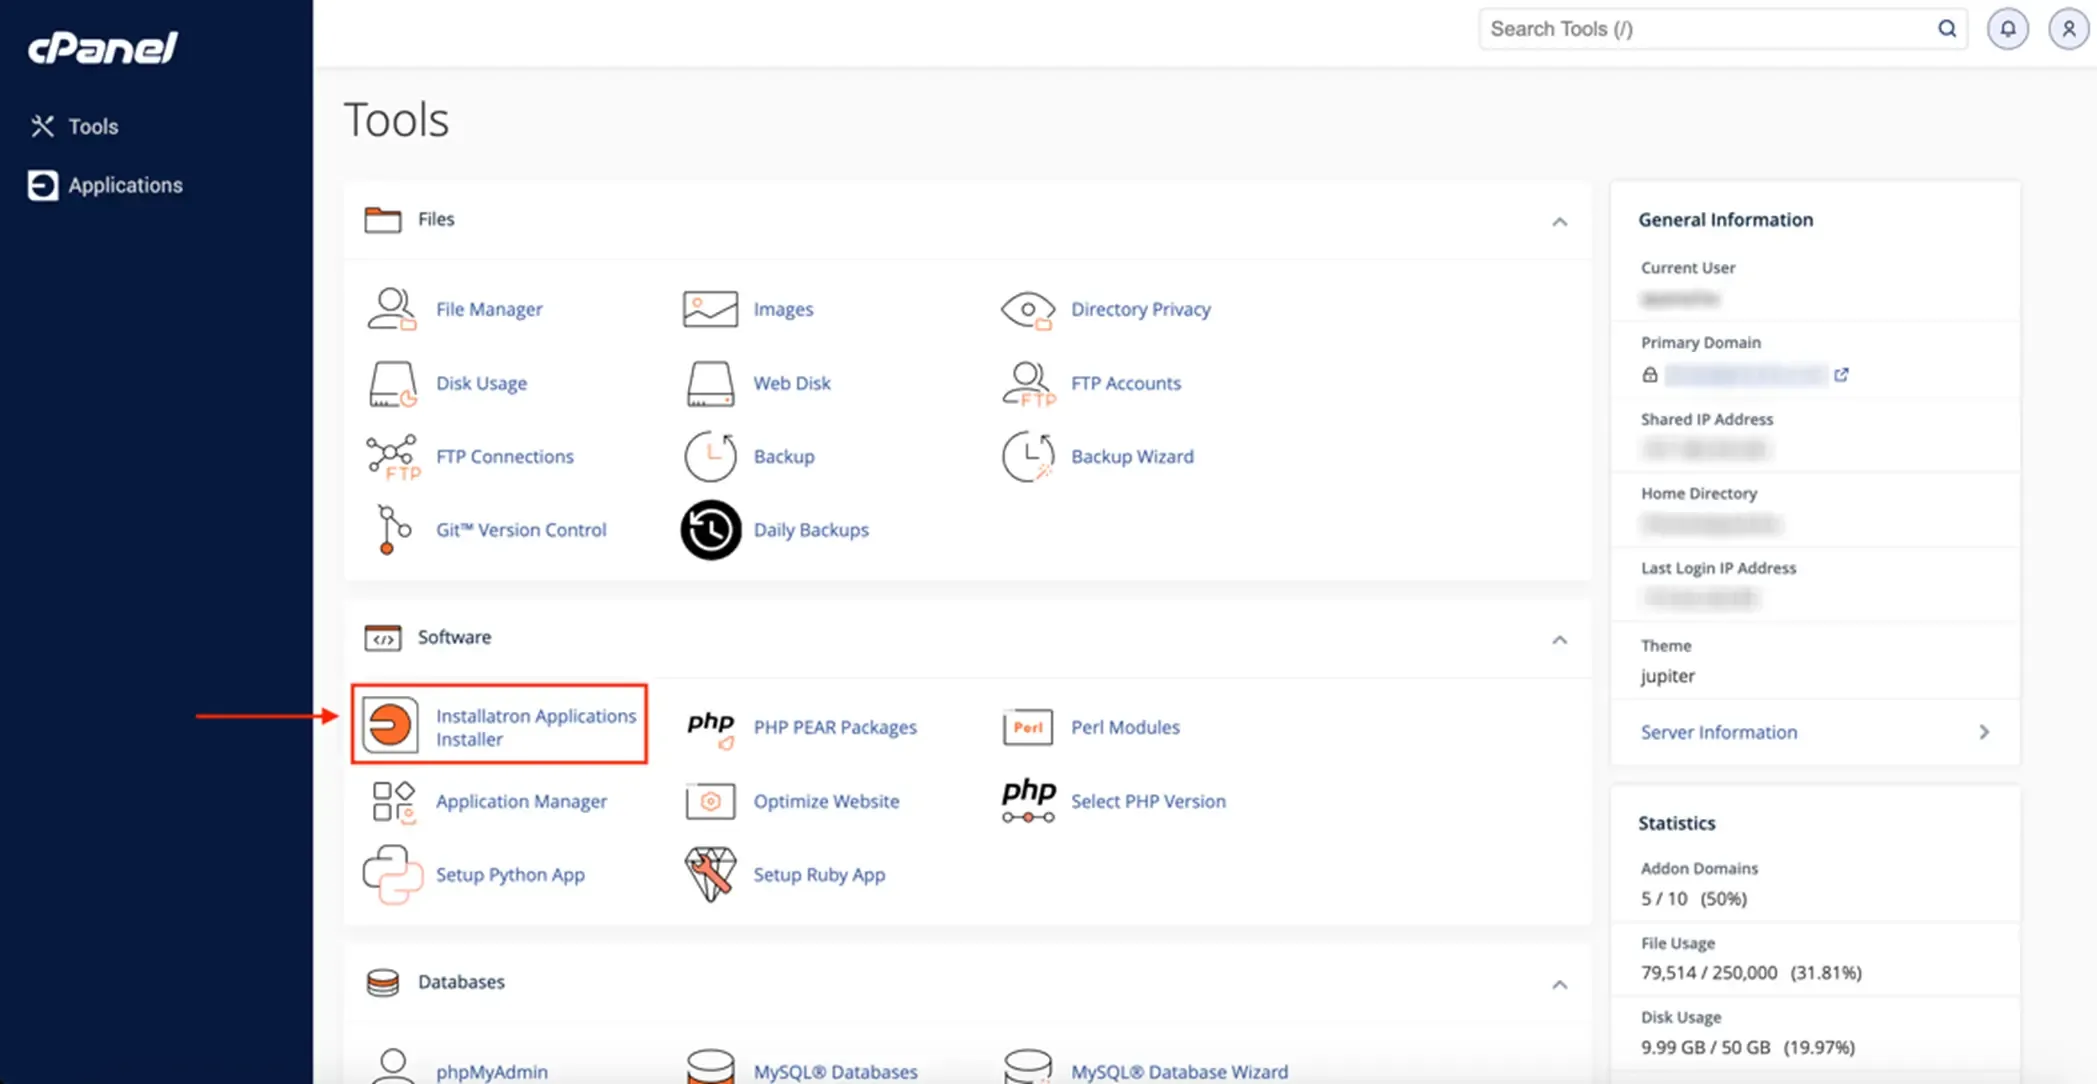
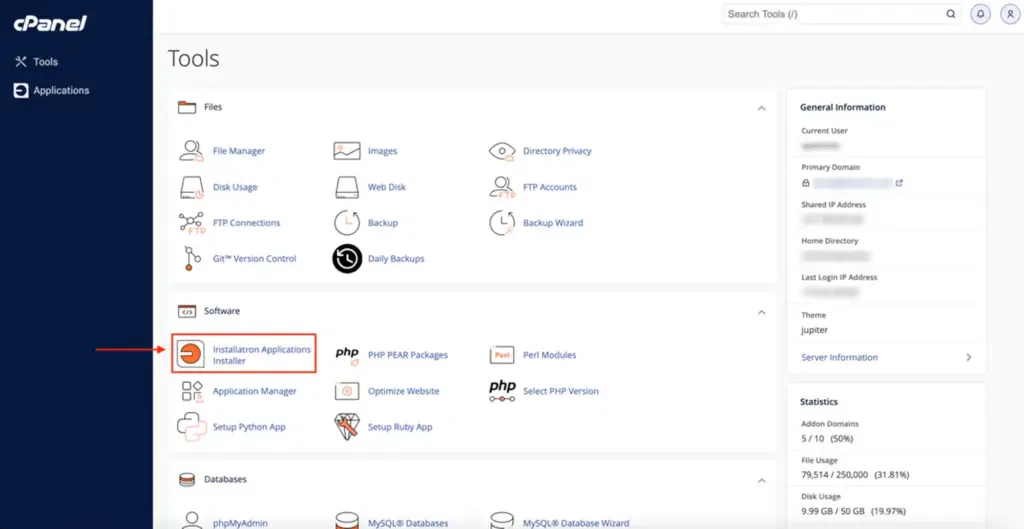
Step 2: Locate Softaculous or WordPress Installer
In your cPanel dashboard:
- Scroll down to the “Software” or “Apps” section
- Look for “Softaculous Apps Installer” or “WordPress Installer”
- Click on the icon to open the installer
If you don’t see Softaculous, look for alternatives like “QuickInstall” or “Installatron” which function similarly.
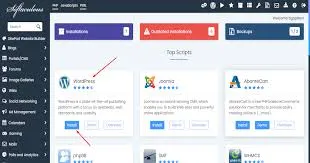
Step 3: Select WordPress
Within Softaculous:
- You may be taken directly to the WordPress page, or you might need to find it
- If needed, click on “Scripts” or “Apps” from the top menu
- Under categories, select “Blogs” or search for “WordPress”
- Click on the WordPress icon
Step 4: Click “Install Now”
On the WordPress information page:
- Review the information about WordPress
- Click the “Install Now” or “Install” button to begin the installation process
Step 5: Configure Installation Settings
Fill out the installation form with your WordPress site details:
Software Setup
- Choose Protocol: Select HTTP:// or HTTPS:// (recommended for security)
- Choose Domain: Select the domain where you want to install WordPress
- In Directory: Leave blank for installation in the root directory, or enter a subfolder name (e.g., “blog” to install at yourdomain.com/blog)
Site Settings
- Site Name: Enter your website’s title
- Site Description: Add a brief description of your site
- Enable Multisite: Leave unchecked unless you specifically need a multisite network
Admin Account
- Admin Username: Create a username (avoid “admin” for security)
- Admin Password: Create a strong password
- Admin Email: Enter your email address for admin notifications
Advanced Options
- Database Name: Usually auto-generated, but you can customize it
- Table Prefix: Default is “wp_” but can be changed for security
- Plugins: Some installers offer pre-installation of popular plugins
- Theme: Option to select an initial theme
Step 6: Complete the Installation
- Review all your settings for accuracy
- Check the “I have read the terms and conditions” box if present
- Click “Install” or “Finish Installation”
- Wait for the installation to complete (usually takes 2-5 minutes)
Step 7: Access Your New WordPress Site
After installation completes:
- You’ll see a success message with important information
- Note the installation URL, admin URL, username, and password
- Click on the admin URL (typically yourdomain.com/wp-admin) to access your WordPress dashboard
- Log in with the username and password you created
Congratulations! You’ve successfully installed WordPress using Softaculous.
Method 2: Manual WordPress Installation on cPanel
For those who prefer more control or don’t have access to auto-installers, the manual installation process provides a deeper understanding of how WordPress works.
Step 1: Download WordPress
First, get the latest WordPress files:
- Visit WordPress.org
- Click “Download WordPress” to get the latest version
- Save the .zip file to your computer
Step 2: Create a Database in cPanel
WordPress requires a database to store your content:
- Log in to your cPanel account
- Scroll to the “Databases” section
- Click on “MySQL Databases”
- Under “Create New Database”:
- Enter a name for your database (prefixed with your cPanel username)
- Click “Create Database”
- Under “MySQL Users”:
- Create a new user with a strong username and password
- Click “Create User”
- Under “Add User To Database”:
- Select the user and database you just created
- Click “Add”
- On the privileges page:
- Select “ALL PRIVILEGES”
- Click “Make Changes”
Note down your database name, username, and password—you’ll need them during WordPress installation.
Step 3: Upload WordPress Files
Now upload the WordPress files to your hosting:
- In cPanel, go to “File Manager”
- Navigate to the public_html directory (or the subdirectory where you want to install WordPress)
- Click “Upload” and select the WordPress .zip file you downloaded
- Once uploaded, select the .zip file and click “Extract”
- After extraction, you’ll have a “wordpress” folder
- Move all files from the “wordpress” folder to your desired installation directory
- Delete the empty “wordpress” folder and the .zip file to clean up
Step 4: Run the WordPress Installer
With files uploaded and database created, run the installer:
- In your web browser, navigate to your domain (or subdomain/subfolder)
- You’ll see the WordPress installation welcome page
- Click “Let’s go!” to continue
Step 5: Enter Database Information
On the database configuration page:
- Enter the database details you created earlier:
- Database Name: Your MySQL database name
- Username: Your MySQL username
- Password: Your MySQL password
- Database Host: Usually “localhost” (leave as default)
- Table Prefix: Default is “wp_” (can change for security)
- Click “Submit” to proceed
Step 6: Run the Installation
After database connection is verified:
- Click “Run the installation”
- On the information page, enter:
- Site Title: Your website name
- Username: Create an admin username (avoid “admin”)
- Password: The installer will suggest a strong password
- Your Email: Enter your admin email address
- Search Engine Visibility: Check/uncheck based on your preference
- Click “Install WordPress”
Step 7: Complete the Installation
After installation completes:
- You’ll see a success message
- Click “Log In” to access your new WordPress dashboard
- Enter your username and password
- You’re now logged into your WordPress admin area
You’ve successfully completed a manual WordPress installation on cPanel!
Post-Installation: Essential Configuration Steps
After installing WordPress, several important configuration steps will enhance your site’s functionality, security, and performance:
1. Update Permalinks
Configure SEO-friendly URL structures:
- Go to Settings → Permalinks
- Select “Post name” (recommended for SEO)
- Click “Save Changes”
This creates more readable URLs like yourdomain.com/sample-post/ instead of yourdomain.com/?p=123.
2. Install Essential Plugins
Enhance your WordPress site with key plugins:
- Security Plugin: Protect your site from threats
- SEO Plugin: Optimize for search engines
- Caching Plugin: Improve site speed with Best WordPress Cache Plugins
- Backup Plugin: Regularly back up your site with guidance from How to Backup WordPress Site
- Contact Form: Add user communication with How to Create a Contact Form in WordPress
3. Set Up SSL Certificate
Secure your site with HTTPS:
- Purchase or activate a free SSL certificate through cPanel (many hosts offer Let’s Encrypt)
- Install and configure the certificate
- Follow our guide on How to add SSL to WordPress to complete the setup
4. Configure Basic Settings
Adjust important WordPress settings:
- General Settings: Verify site title, tagline, and timezone
- Reading Settings: Set homepage display and blog pages
- Discussion Settings: Configure comment moderation
- Media Settings: Adjust image sizes and organization
- Privacy Settings: Create and set a privacy policy page
5. Install and Customize a Theme
Select a design that matches your site’s purpose:
- Go to Appearance → Themes → Add New
- Browse or search for themes (consider Free WordPress Themes for budget options)
- Install and activate your chosen theme
- Customize appearance through Appearance → Customize
- Consider using Best WordPress Page Builders for easier design control
6. Create Essential Pages
Set up fundamental content:
- Homepage: Your site’s main landing page
- About: Information about you or your organization
- Contact: How visitors can reach you
- Privacy Policy: Legal information about data handling
- Terms of Service: Rules for using your site
7. Set Up Google Analytics
Track your site’s performance:
- Create a Google Analytics account
- Follow our guide on How to Add Google Analytics 4 to WordPress
- Verify proper tracking implementation
Performance Optimization for cPanel WordPress Sites
Ensure your new WordPress installation runs efficiently:
Server-Side Optimization
Improve hosting performance:
- PHP Version: Update to the latest supported PHP version in cPanel
- MySQL Optimization: Adjust database settings for better performance
- Resource Limits: Monitor and adjust CPU and memory usage
- Cron Jobs: Set up proper WordPress cron management
- Compression: Enable GZIP compression for faster loading
WordPress Optimization
Enhance WordPress performance:
- Caching: Implement Best WordPress Cache Plugins
- Image Optimization: Follow How to Optimize Images for WordPress
- Database Cleanup: Regularly optimize the WordPress database
- Plugin Management: Minimize plugin usage and remove unused plugins
- Theme Efficiency: Use lightweight, well-coded themes
For comprehensive performance improvements, follow our WordPress Page Speed Optimization guide.
Security Hardening for New WordPress Installations
Protect your fresh WordPress site from threats:
cPanel Security Settings
Secure your hosting environment:
- Password Protection: Set up directory password protection
- IP Blocking: Restrict access from suspicious IPs
- Hotlink Protection: Prevent image theft
- ModSecurity: Enable web application firewall
- SSH Access: Configure secure shell access if needed
WordPress Security Measures
Implement WordPress-specific protections:
- Strong Passwords: Use complex, unique passwords
- Limited Login Attempts: Restrict repeated login failures
- Two-Factor Authentication: Add an extra security layer
- File Permissions: Set proper permissions for WordPress files
- Security Plugins: Install comprehensive protection
For detailed security implementation, follow our WordPress Security Best Practices.
Troubleshooting Common Installation Issues
Even with careful installation, you might encounter these issues:
Database Connection Errors
When WordPress can’t connect to your database:
- Verify Credentials: Double-check database name, username, and password
- Check Database Host: Confirm the correct server (usually “localhost”)
- Database Existence: Ensure the database was created successfully
- User Privileges: Verify the database user has sufficient permissions
- wp-config.php: Check for syntax errors in this file
500 Internal Server Errors
When server configuration issues occur:
- PHP Memory Limit: Increase available memory in php.ini or .htaccess
- Plugin Conflicts: Disable all plugins to identify problematic ones
- Corrupted Core Files: Reinstall WordPress core files
- Server Limits: Check for hosting resource limitations
- PHP Version: Ensure compatibility between WordPress and PHP version
Blank White Screen (White Screen of Death)
When WordPress fails to render properly:
- Enable Debugging: Add debugging code to wp-config.php
- Increase Memory: Adjust PHP memory limits
- Theme Issues: Switch to a default theme
- Plugin Problems: Deactivate all plugins
- PHP Errors: Check server error logs in cPanel
For more troubleshooting assistance, see 15 Easy Fixes for Common WordPress Issues.
Advanced cPanel WordPress Management
Once your site is running, explore these advanced management techniques:
Creating Staging Environments
Test changes safely:
- Clone your live site to a subdomain
- Make and test changes in the staging environment
- Push changes to the live site when ready
- Consider using Best WordPress Staging Plugins for easier management
Managing Multiple WordPress Sites
Efficiently handle several installations:
- Organize sites in separate cPanel accounts or subdomains
- Use management tools for centralized updates
- Implement consistent backup strategies
- Consider WordPress Multisite Setup Guide for multiple related sites
Automated Backup Strategies
Protect your content:
- Configure cPanel’s built-in backup tools
- Set up automated database backups
- Implement WordPress backup plugins
- Store backups in multiple locations
- Test restoration processes regularly
For comprehensive backup strategies, see How to Backup WordPress Site.
WordPress Development in cPanel Environment
For developers working in cPanel:
Local Development to cPanel Workflow
Streamline development processes:
- Develop and test locally
- Push changes to staging on cPanel
- Use version control for code management
- Implement deployment automation when possible
- Migrate carefully to production
Version Control Integration
Manage code changes professionally:
- Set up Git repositories for themes and plugins
- Configure SSH access for version control
- Implement deployment workflows
- Document changes and versions
- Collaborate effectively with team members
Custom PHP and Server Configurations
Optimize for specific requirements:
- Create custom php.ini files
- Configure .htaccess for specific needs
- Set up environment-specific variables
- Implement advanced caching strategies
- Optimize for specific WordPress applications
Comparing cPanel to Other Hosting Environments
While cPanel is popular, consider how it compares to alternatives:
cPanel vs. Managed WordPress Hosting
Understanding the differences:
- cPanel Advantages:
- Greater control over server settings
- Usually more affordable
- Flexibility for non-WordPress applications
- Familiar interface for many users
- Direct access to server files and configurations
- Managed WordPress Advantages:
- WordPress-specific optimizations
- Automatic updates and backups
- Specialized WordPress support
- Enhanced security measures
- Often better performance
For a quality managed WordPress option, consider Flywheel WordPress Hosting.
cPanel vs. Other Control Panels
How cPanel compares to alternatives:
- Plesk: More Windows server support, different interface
- DirectAdmin: Lighter resource usage, more affordable
- CloudPanel: Modern interface, optimized for cloud (what we use at Jackober.com)
- Cyberpanel: Focused on LiteSpeed web server
- Custom Dashboards: Host-specific interfaces like Kinsta or WP Engine
cPanel vs. Server Management Tools
For more advanced users:
- Command Line: Greater control but steeper learning curve
- Server Control Panels: Like Webmin or Virtualmin
- Cloud Dashboards: AWS, Google Cloud, or Azure interfaces
- Container Management: Docker and Kubernetes approaches
- DevOps Platforms: CI/CD pipeline integration
Special WordPress Installations on cPanel
Some WordPress sites have unique requirements:
E-commerce Site Installation
For online stores:
- Follow standard WordPress installation
- Install WooCommerce or other e-commerce plugins
- Configure payment gateways using Payment Gateways for WordPress Websites
- Set up product catalog and shipping options
- Implement security measures for transactions
For complete guidance, see How to create an online store with WordPress.
Membership Site Setup
For sites with restricted content:
- Complete basic WordPress installation
- Install membership plugins from Best WordPress Membership Plugins
- Configure membership levels and access rules
- Set up payment processing for subscriptions
- Create member-only content areas
Learn more at How to Create a Membership Site with WordPress.
Multilingual Website Configuration
For international audiences:
- Install WordPress normally
- Add translation plugins from Best WordPress Translation Plugins
- Configure language settings and translations
- Set up language switcher functionality
- Create content in multiple languages
WordPress for Specific Industries
Tailored installations for different sectors:
- Magazine Sites: Use Best Magazine WordPress Theme for content-rich publications
- Construction Companies: Implement Best Construction WordPress Themes for industry-specific features
- Architectural Firms: Choose Best Architecture WordPress Themes for design portfolios
- Musicians and Bands: Select Best Music WordPress Themes for audio features
- Parenting Blogs: Utilize Parenting WordPress Theme for family-focused sites
WordPress Maintenance on cPanel
Ensure ongoing site health with these practices:
Regular Update Procedures
Keep everything current:
- Update WordPress core regularly
- Maintain current themes and plugins
- Check for compatibility before major updates
- Create backups before updating
- Test functionality after updates
Database Maintenance
Optimize your database:
- Regularly clean up post revisions using WordPress Content Revision Control
- Remove spam comments and trashed items
- Optimize database tables
- Repair corrupted tables when needed
- Monitor database size and growth
Security Audits and Monitoring
Maintain vigilant protection:
- Regularly scan for malware
- Monitor file changes
- Review user accounts and permissions with WordPress User Role Editor Plugin
- Check for vulnerable plugins
- Review server logs for suspicious activity
Migration Considerations
When you outgrow your current hosting:
- Evaluate when it’s time to upgrade
- Plan careful migrations
- Follow best practices from How to Migrate WordPress Site to New Host
- Consider managed WordPress hosting for growing sites
- Maintain proper redirects and SEO during transitions
Conclusion: Making the Most of WordPress on cPanel
Installing WordPress on cPanel provides a solid foundation for your website while giving you control over your hosting environment. The combination of cPanel’s user-friendly management tools and WordPress’s flexible content management system creates a powerful platform for websites of all types and sizes.
While we at Jackober have moved to CloudPanel for our own hosting needs, cPanel remains an excellent choice for many WordPress users, particularly those starting out or managing multiple client sites like ValorantInsights.com and MSGlowUp.com. Its familiar interface, widespread availability, and extensive documentation make it a comfortable environment for WordPress installation and management.
Whether you choose the automated installation through Softaculous or the more hands-on manual approach, the key to success lies in proper configuration, security implementation, and ongoing maintenance. By following the guidelines in this article, you’ll create a solid foundation for your WordPress website and avoid common pitfalls that can affect performance and security.
Remember that installation is just the beginning of your WordPress journey. Take time to explore the platform’s capabilities, experiment with different themes and plugins, and continuously optimize your site for better performance and user experience.
For assistance with WordPress installation, optimization, or custom development, our team at Jackober specializes in WordPress solutions for businesses and individuals. As a WordPress Expert for Hire, I can help you navigate the complexities of WordPress and create a site that perfectly matches your goals and requirements.
FAQ: WordPress Installation on cPanel
Q: Is it better to use Softaculous or manual installation for WordPress?
A: Both methods are valid, but they serve different needs. Softaculous (or similar auto-installers) is ideal if you want a quick, straightforward installation with minimal technical knowledge. It handles database creation, file uploads, and basic configuration automatically. Manual installation gives you more control over the process and a better understanding of WordPress’s structure. It’s particularly valuable if you have specific requirements, need to modify core files, or want to learn more about WordPress’s inner workings. For most users, especially beginners, Softaculous provides the best balance of simplicity and functionality. Advanced users and developers often prefer manual installation for the additional control it provides.
Q: What PHP version should I use for WordPress on cPanel?
A: WordPress performs best on the latest supported PHP versions. As of 2023, PHP 8.0 or 8.1 is recommended for optimal performance and security. WordPress officially supports PHP 7.4 and above, but older versions (7.3 and below) are no longer receiving security updates and should be avoided. In cPanel, you can change PHP versions through the “MultiPHP Manager” or “PHP Version” tool. Before upgrading PHP, check that your themes and plugins are compatible with newer PHP versions. Some older code may generate errors on PHP 8.0+. Always back up your site before changing PHP versions, and test thoroughly after the change. For performance optimizations related to PHP, review our WordPress Page Speed Optimization guide.
Q: How can I secure my WordPress installation on cPanel?
A: Implement multiple security layers: 1) Use strong, unique passwords for both cPanel and WordPress admin accounts, 2) Install and configure an SSL certificate following How to add SSL to WordPress, 3) Change the default database prefix during installation (instead of wp_), 4) Install a reputable security plugin, 5) Enable two-factor authentication for WordPress login, 6) Implement login attempt limitations, 7) Use cPanel’s IP Blocker to restrict access from suspicious locations, 8) Set proper file permissions (typically 755 for directories and 644 for files), 9) Keep WordPress core, themes, and plugins updated, and 10) Regularly scan for malware. For comprehensive security guidance, follow our WordPress Security Best Practices article.
Q: What’s the difference between installing WordPress in the root directory vs. a subdirectory?
A: Installing WordPress in the root directory (public_html) means your site will be accessible directly at yourdomain.com. Installing in a subdirectory (e.g., public_html/blog) means your WordPress site will be at yourdomain.com/blog. Root installation is typically preferred for sites where WordPress will power the entire website. Subdirectory installation is useful when: 1) Adding WordPress to an existing non-WordPress site, 2) Creating multiple WordPress installations on one domain, 3) Setting up a staging environment, or 4) Organizing different sections of a complex site. You can actually install WordPress in a subdirectory but make it appear as if it’s in the root by adjusting WordPress’s site URL settings and using .htaccess redirects—a technique sometimes used for organizational purposes while maintaining a clean URL structure.
Q: How many WordPress installations can I have on one cPanel account?
A: Most cPanel hosting accounts allow multiple WordPress installations, limited primarily by your hosting resources rather than a specific number restriction. The practical limitations include: 1) Disk space available in your hosting package, 2) Database allocation (many hosts limit the number of MySQL databases), 3) Server resources like CPU and RAM that all sites must share, and 4) Bandwidth limitations of your hosting plan. For better organization and performance, consider using WordPress Multisite Setup Guide if you need to manage multiple related sites. If you’re building many client sites, you might eventually want to consider a reseller hosting account or moving to a VPS for better resource allocation and site isolation.
Q: Can I move my WordPress site from one cPanel account to another?
A: Yes, you can migrate WordPress between cPanel accounts using several methods: 1) Manual migration by backing up files and database from the source account and restoring them to the destination, 2) Using a migration plugin that creates a complete site package, 3) Utilizing cPanel’s built-in backup and restore functionality, or 4) Using Softaculous’s clone feature if both accounts have it. The process typically involves exporting the database, copying all files, updating the wp-config.php file with new database credentials, and updating URLs in the database. For detailed instructions, refer to our guide on How to Migrate WordPress Site to New Host, which covers the process comprehensively, including special considerations for complex sites.
Q: What should I do if I encounter errors during WordPress installation?
A: Troubleshoot methodically based on the type of error: 1) For database connection errors, verify database name, username, password, and host in wp-config.php, 2) For 500 Internal Server errors, check PHP version compatibility and memory limits, 3) For white screen issues, enable WordPress debugging by adding define('WP_DEBUG', true) to wp-config.php, 4) For permission errors, ensure proper file ownership and permissions (typically 755 for folders and 644 for files), 5) For timeout errors, try breaking the process into smaller steps or contact your host about server timeouts. Most installation issues relate to database configuration, file permissions, or server limitations. If using Softaculous, try the manual installation method as a troubleshooting step to identify where the process is failing. For persistent issues, check the error logs in cPanel (under “Errors” or “Logs”) for specific error messages that can guide your troubleshooting.
Q: Is cPanel the best environment for WordPress?
A: cPanel is excellent for many WordPress users, particularly those who need a balance of control and user-friendliness. However, “best” depends on your specific needs. cPanel advantages include: familiar interface, widespread availability, good documentation, and flexibility for various applications beyond WordPress. However, specialized WordPress hosting environments like Flywheel WordPress Hosting often provide better performance, WordPress-specific optimizations, automatic updates, and specialized support. For high-traffic sites, complex WordPress applications, or users who prioritize performance over control, managed WordPress hosting might be preferable. For developers, agencies managing multiple sites, or users who want maximum control at a reasonable price point, cPanel hosting remains an excellent choice. Consider your technical comfort level, budget, and specific website requirements when making this decision.